Many people have come to us with questions following accidental erasure of communication boards from their iPad and we felt that it was important to write a post explaining how to back up iPad content. This information is relevant and useful to any iPad user.
Backing up content on the iPad is essential for people who use apps on the iPad that create and store information. A back up will allow you to restore that content if the iPad crashes, gets erased by mistake, or even gets lost or stolen. Back up of user-created content is important especially for people who use the iPad as an augmentative and alternative communication (AAC) device or those that use it for school or work.
When talking about back ups it is important to recognize the difference between backing up of the iPad and backing up of app content.
Backing Up Your iPad
Backing up your iPad saves information regarding the apps you have, how they are organized and settings you have set. It also allows you to save photos, contacts, and other information of this type. Regular backups of this type are important and will save time and frustration if your iPad gets erased or stops working, or if you transfer to a new device. This kind of back up includes home screens and app folders, so that a restore from a backup will look the same as the old set up. User settings will remain the same (except for payment and Touch ID which will have to be redone), and photos and videos will be saved as well.
This kind of back up can be done in one of two ways:
- Backing up to a computer through iTunes – Ensure that the latest version of iTunes is installed. Connect the iPad to the computer. A message may appear on the iPad screen asking you to give the computer access, which you need to approve. After a few seconds, a small iPad icon will appear in the top left corner. Press on it.
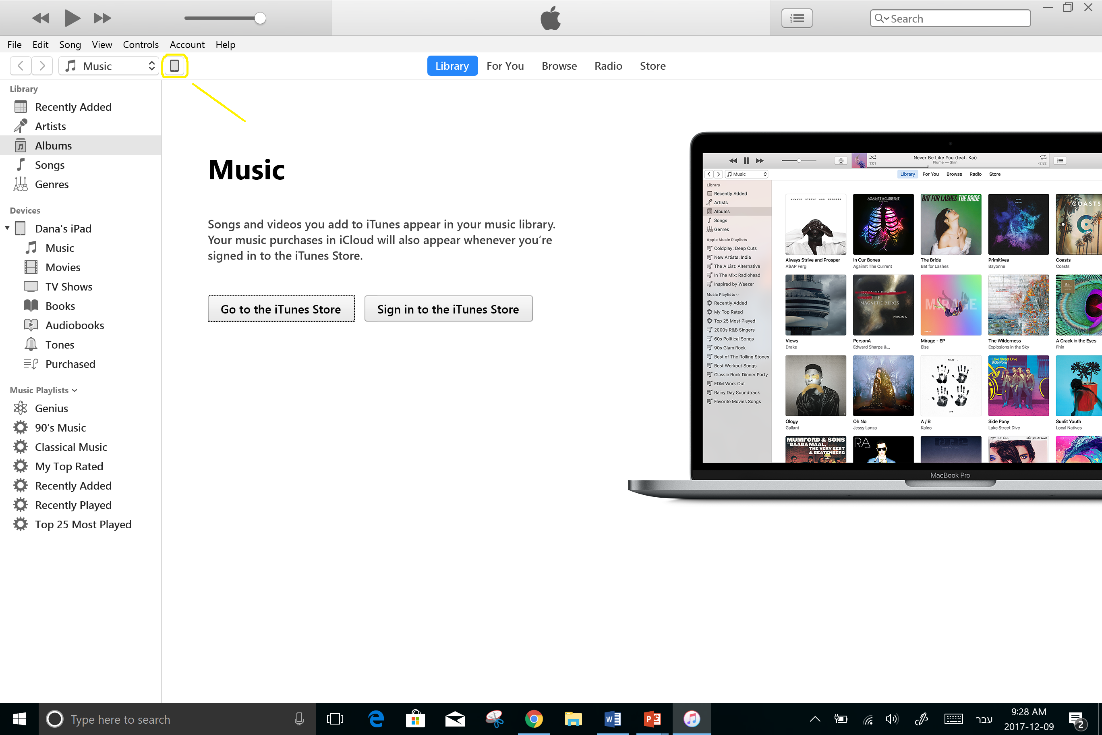
The iPad button is highlighted in yellow
You may then choose if you wish to back up to iCloud or to the computer. It is important to remember which computer you created a backup on or which iCloud account you used for the backup, in case the iPad needs to be restored at a later time.
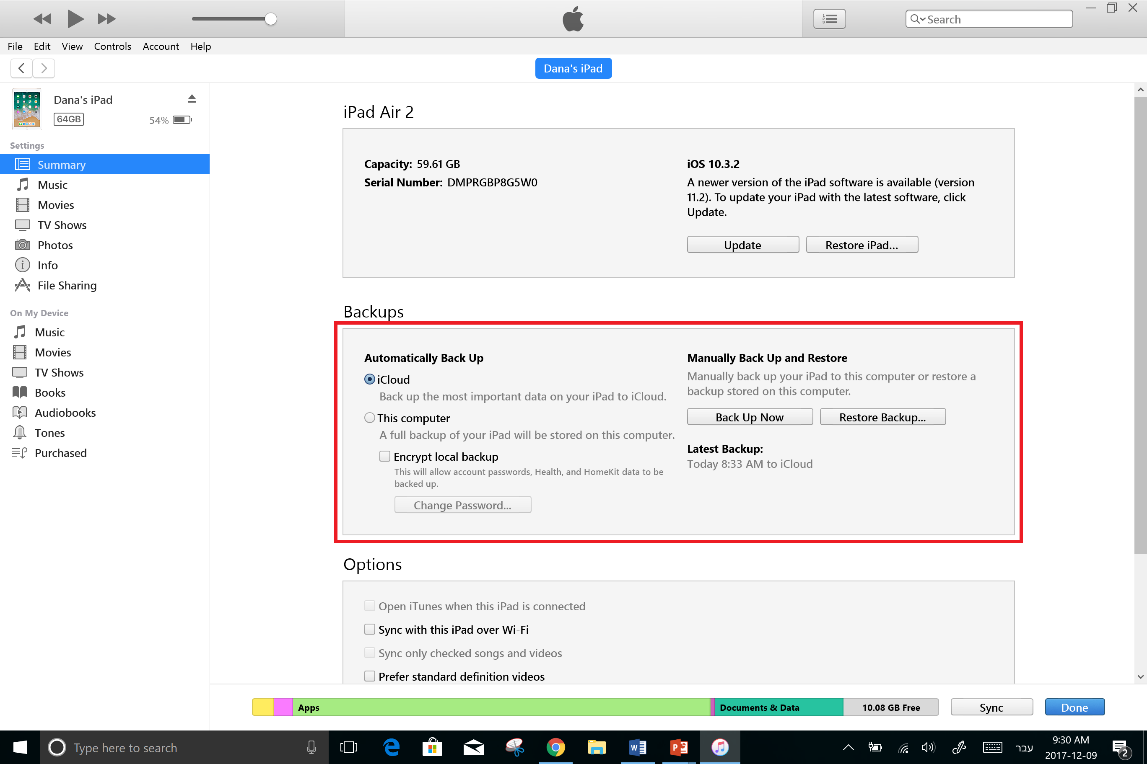
Back up to the computer or to iCloud
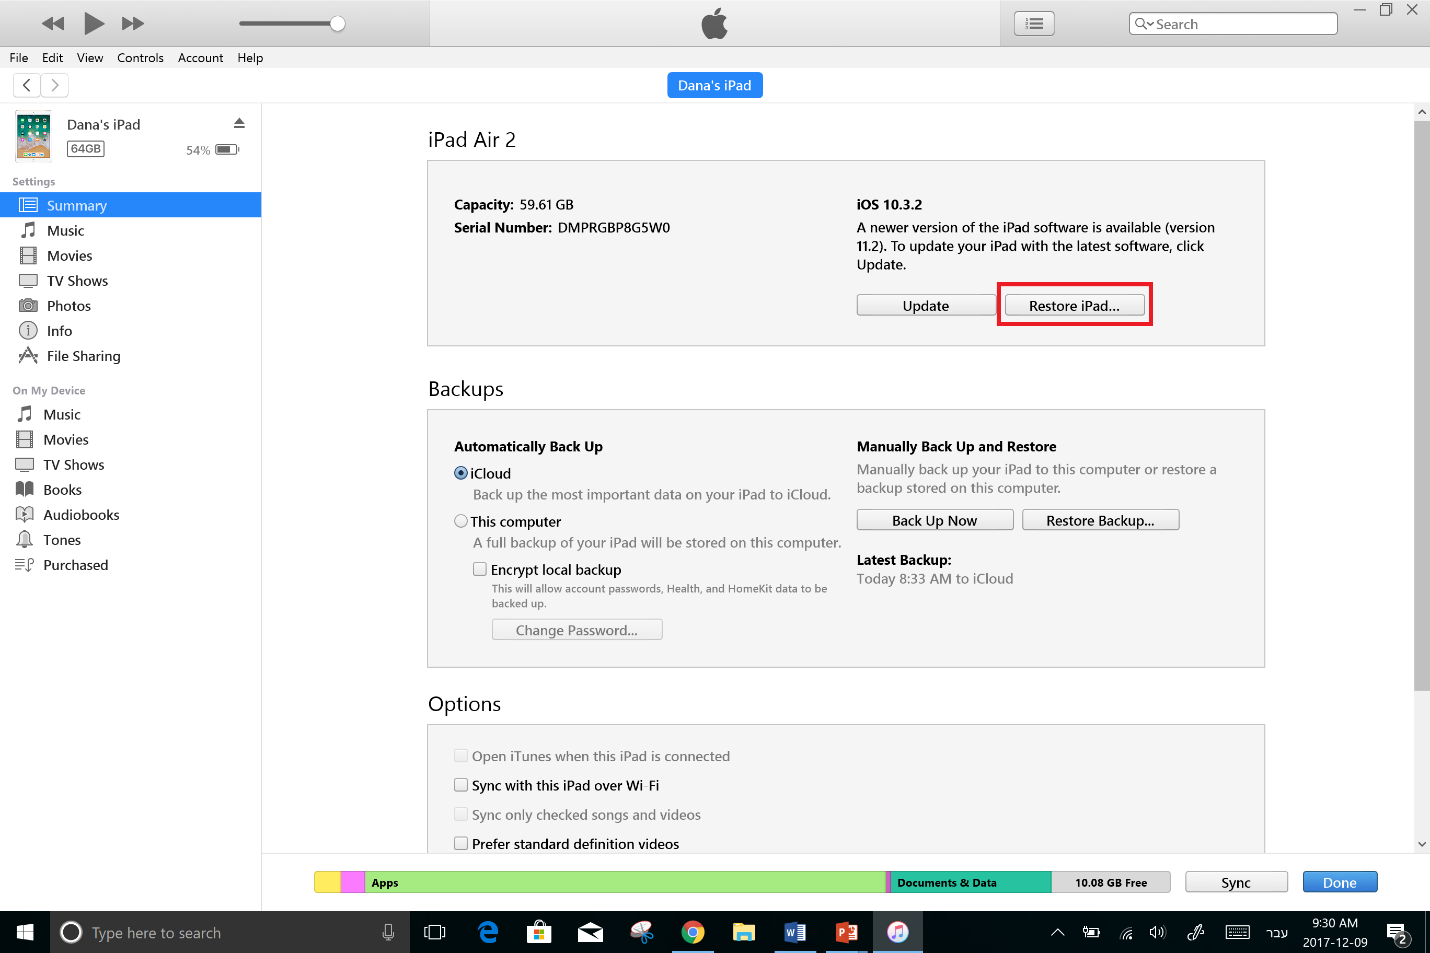
Restore iPad. Pressing the highlighted button will lead to the restore process. You will be able to choose whether to restore to factory settings or from a previous backup.
- Backing up to iCloud (without connecting to the computer) – The iPad can be backed up to the cloud and is set in iPad Settings. You can back up manually by pressing Back Up Now, and you can also set it to back up automatically. Once turned on, iPad information will back up automatically to iCloud once the iPad is plugged in, locked, and connected to Wifi.
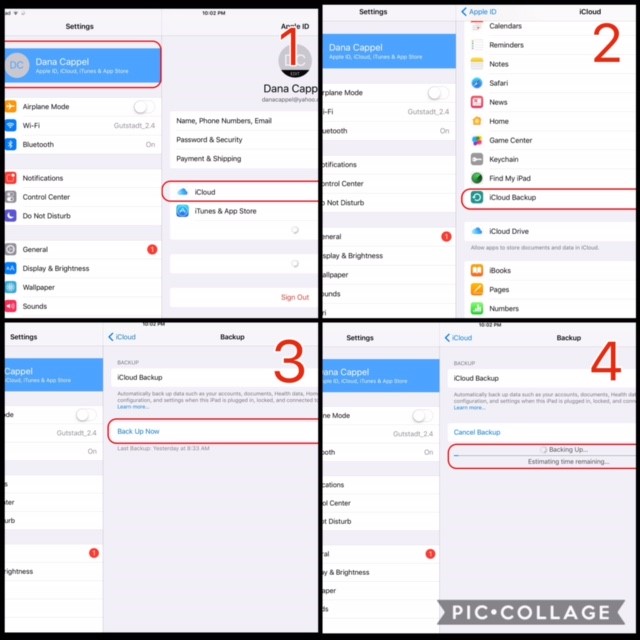
Back up to the cloud: 1. Press on User name in top left corner, and then on” iCloud”. 2. Scroll down and press on “iCloud Backup”. 3. Press “Back Up Now”. 4. Wait until back up is completed.
Backing Up Content
Certain apps allow you to create content (documents, communication boards, etc…). If you are a regular user of these apps, performing regular backups of their content is recommended.
Backing up of content can be done in one of three ways:
- Back up to a computer using iTunes – This is done similarly to backing up the iPad to iTunes. Connect the iPad to the computer and approve access. Press on the iPad icon, and choose “File Sharing” from the menu on the left side. Once you’ve chosen it you will see a list of all the apps with created content files that can be updated or saved on the computer. Choose the app and then the file you wish to save, scroll down to the bottom and click “save to” on the bottom right (not shown in photo). You can then choose where to save the files to on your computer. and click save.
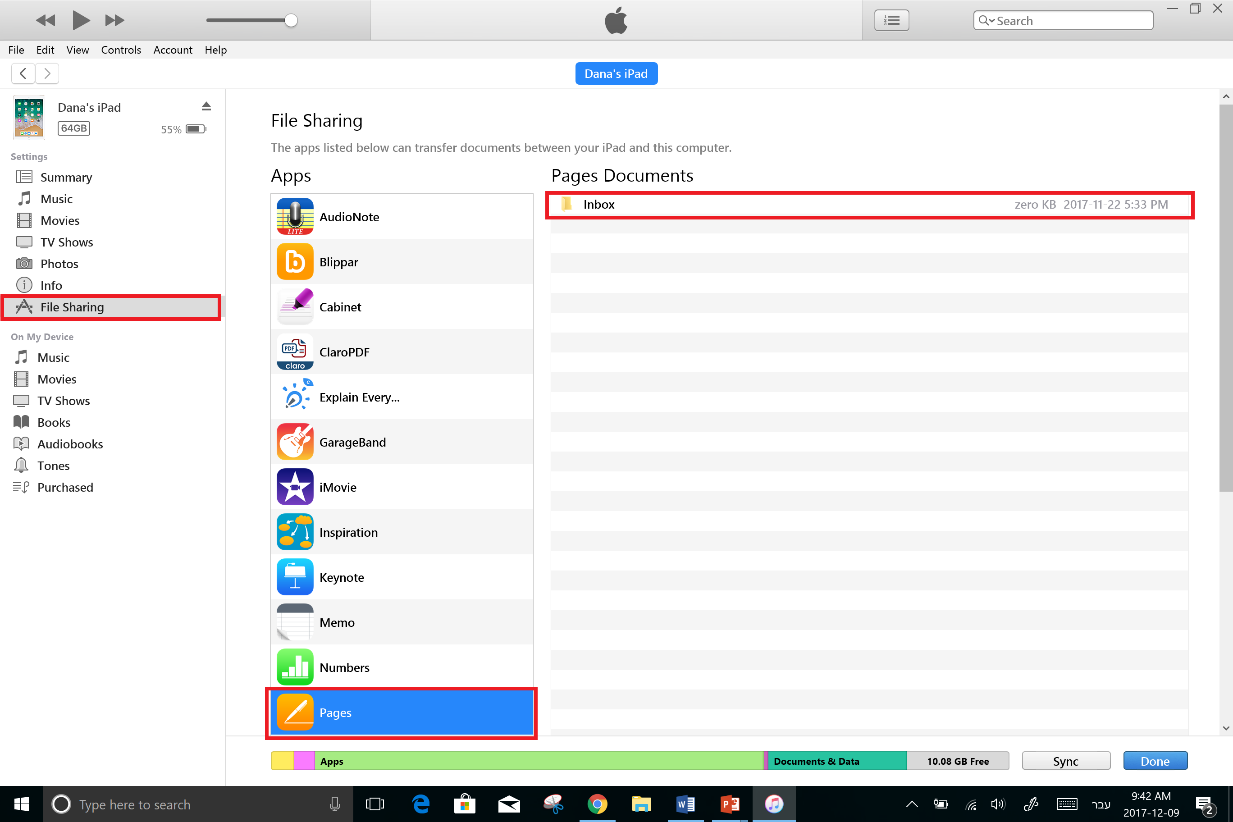
File Sharing and Saving. Choose the app and the files you wish to save and click “Save to” in the bottom right corner. (not in photo)
- Back up of files from within the app – Many apps allow you to send files manually to iCloud, to another iPad user in the vicinity or to email. Each file you choose to send in this way will essentially exist in another location, independent of your iPad and thus can later be retrieved if needed. Of course, if you later update or change the file you shared, an additional back up would be needed.
An Example from Touch Chat

Backing up and saving communication boards in TouchChat – enter Menu, press on “Import/Export Vocab”. Afterward choose “Export and Share”
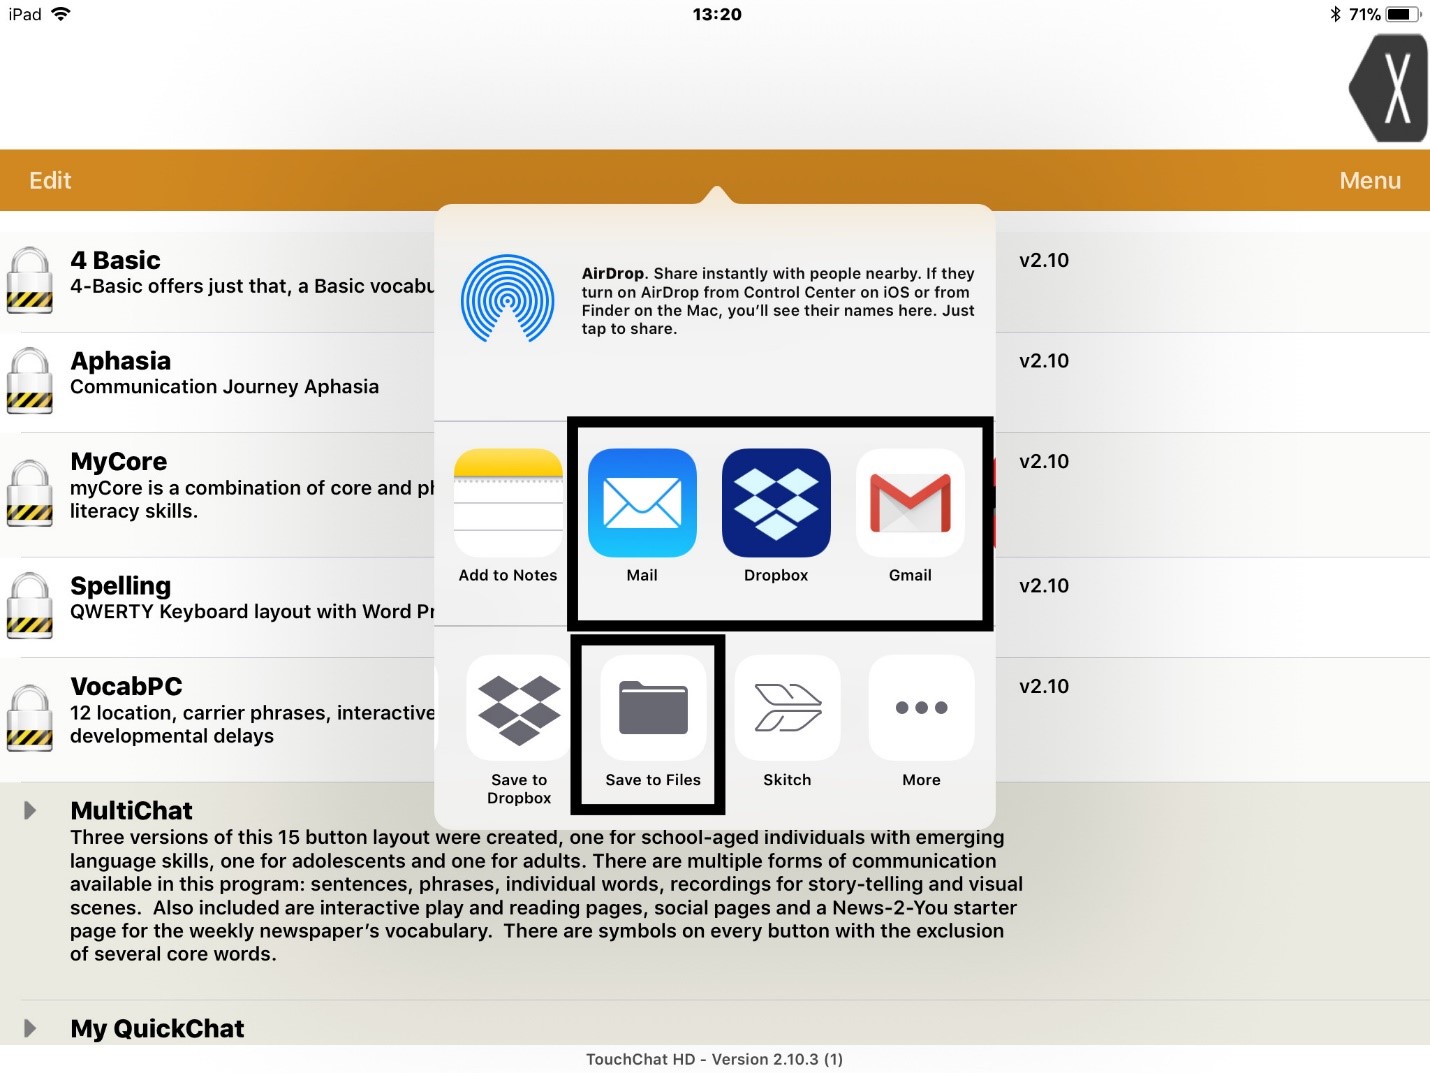
Continued: Backing up communication boards in TouchChat – they can be shared by email, to Dropbox, to Files, or to a nearby iPad using AirDrop. If your iPad is not updated to iOS11, you will not have the option to save to Files, but to iCloud.
- Using a flash drive made for iPad – Files and photos can be saved to a flash drive made specifically to work with iPads and iPhones. They have both USB and lightening connectors allowing for the transfer of content between computers and iDevices.
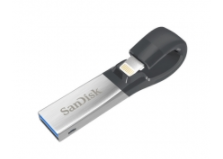
The SanDisk iXpand Flash Drive
These flash drives can be found online or at any electronics store. Once you plug it in to your iDevice you will be prompted to download the accompanying app (most are free).
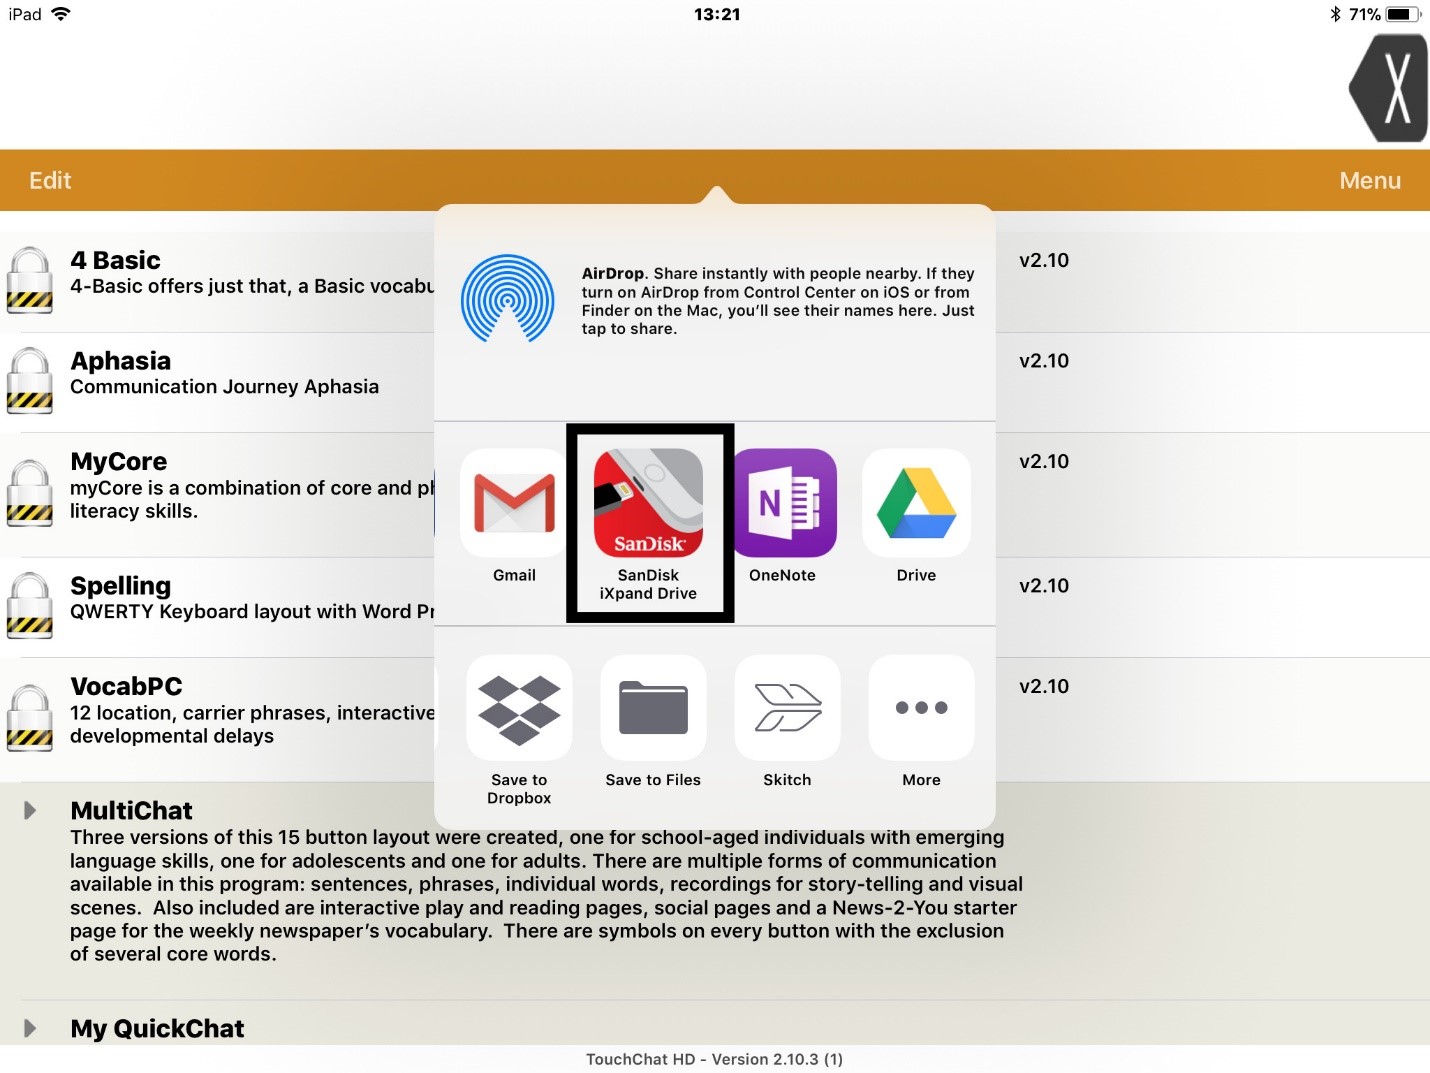
Backing up communication boards in TouchChat to a flash drive.
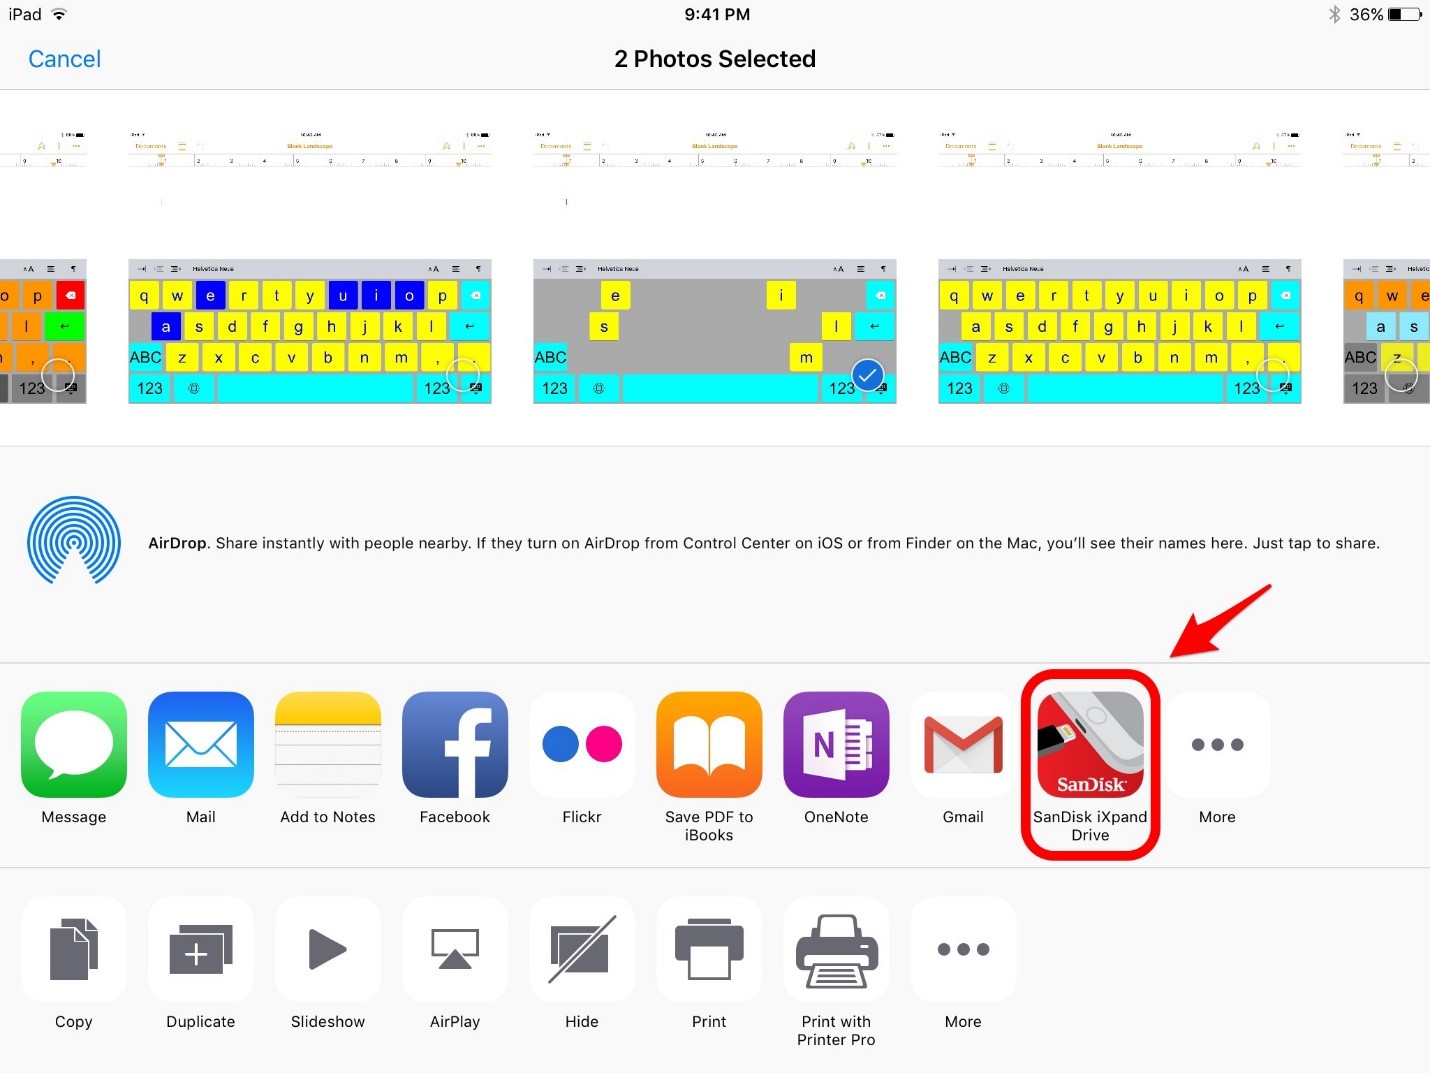
Transferring other files to the flash drive (in this case from Photos).
We will stop our discussion on back ups here for now…stay tuned for a second post on backing up Tiny Tap content.
If you have any other ideas or questions about back ups, please let us know in the Comments!


Leave a Reply